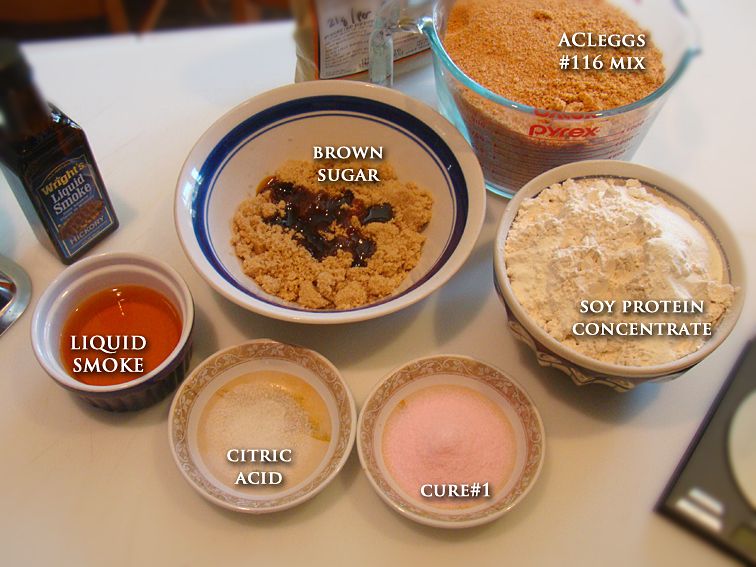
Here`s a relatively QUICK N EASY version of Lebanon Bologna from a recipe that is significantly easier and faster than the traditional "ferment-n-smoke 3 days" version. Two of the shortcuts involve using a standard Snack Stick mxi (AC Leggs#116), and citric acid for tang.
I love the real stuff I had in PA years ago-and the store-bought stuff isn't the same- and I was hoping to replicate the smokey bologna at home. I've read many positive reviews of this recipe, so here we go...
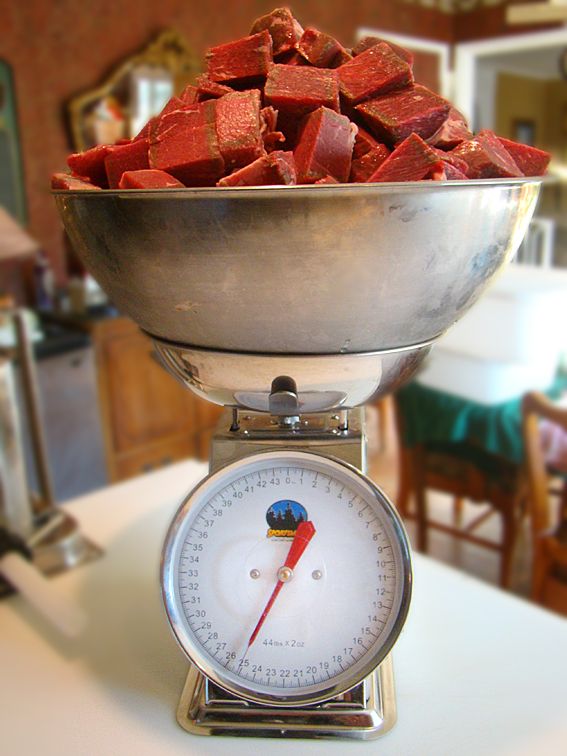
Start with a load of beef (25 pounds of lean beef). The local market has a nice '2 for 1' deal on some nice cuts so I took advantage & saved some big $$...
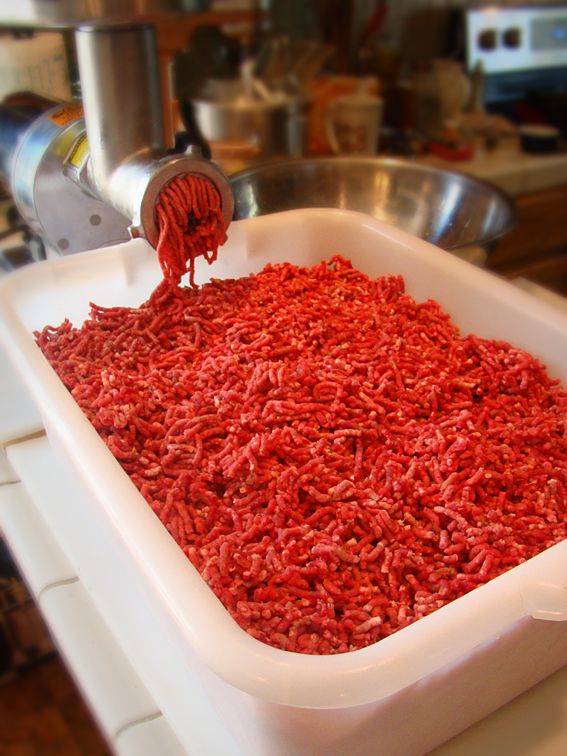
I`m going to do a single medium grind (
4.5 mm plate).
Grinding under way:
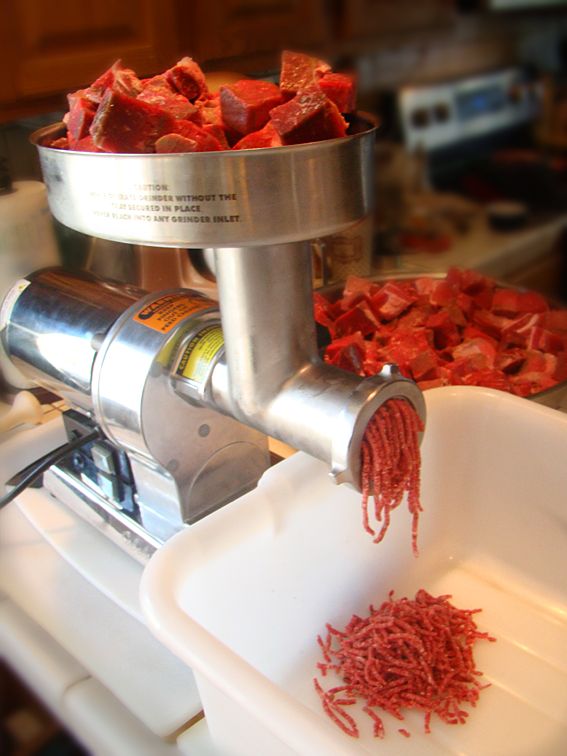
In less than 4 minutes, I've a big lug of lean ground beef...
To the meat I`ll be adding the follow ingredients. The recipe called for `
dark brown sugar` but all I had was the light brown. Easy fix. I added some molasses. For a
"Sweet Lebanon Bologna" I would double the amount of sugar, but since this was my first go at this recipe, I played it safe. I didnt want twenty-five pounds of
"too sweet" meat!
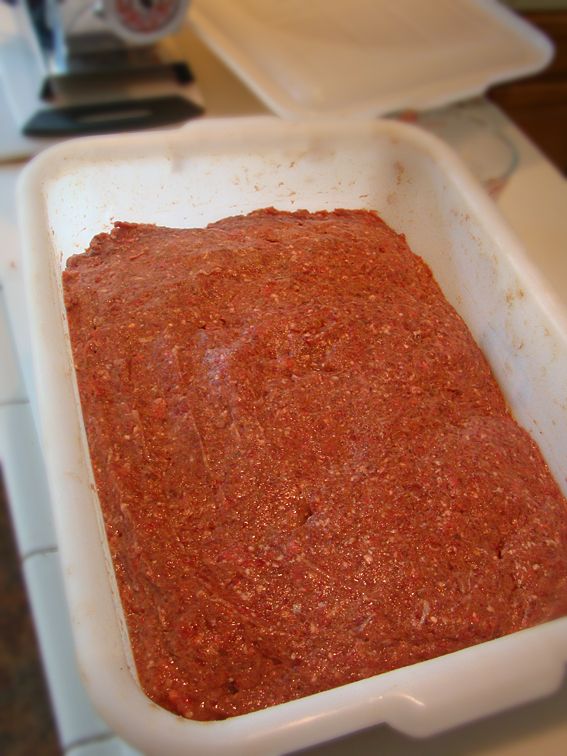
I mixed the dry with an ample amount of chilled water and mixed the load.
All mixed & ready to stuff:
I finally broke down & purchased a smaller stuffer (5 pounder). Normally I`d use my kirby-cannon (12 pounds), but it`s in need of repair. So rather than use my grinder as a `stuffer` again-which would be
absolutely nutz for doing a 25-pound batch- we`ll break in this little
Grizzly
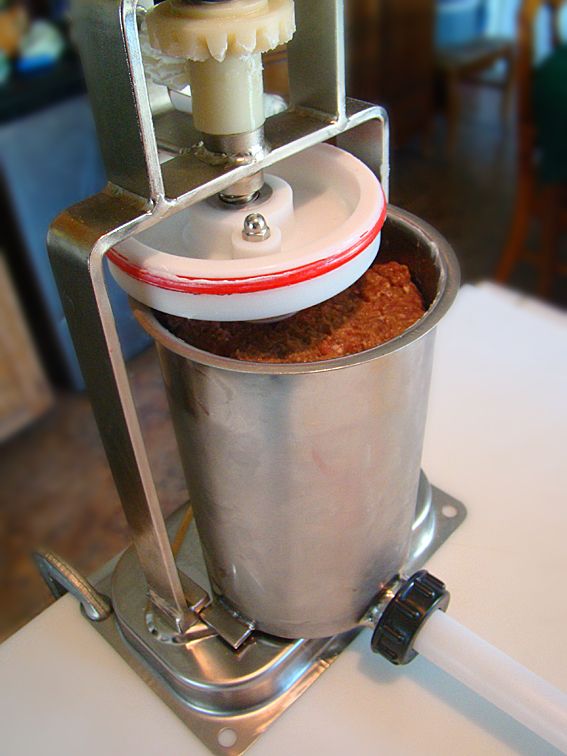
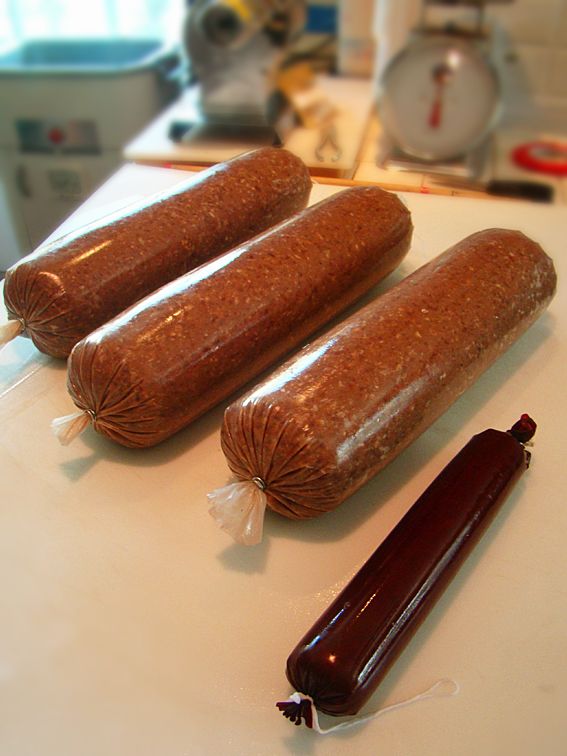
I`m using 4" clear fibrous casing for these bolognas. I`m estimating about 3 or so total. The new stuffer makes filling these chubs MUCH easier than the grinder ("doh! No kidding!`). The hardest part of the whole job was taking photos while doing it. The
red tape you see on the work surface indicates the maximum length I wanted to make these chubs. This is important as we`ll see later.
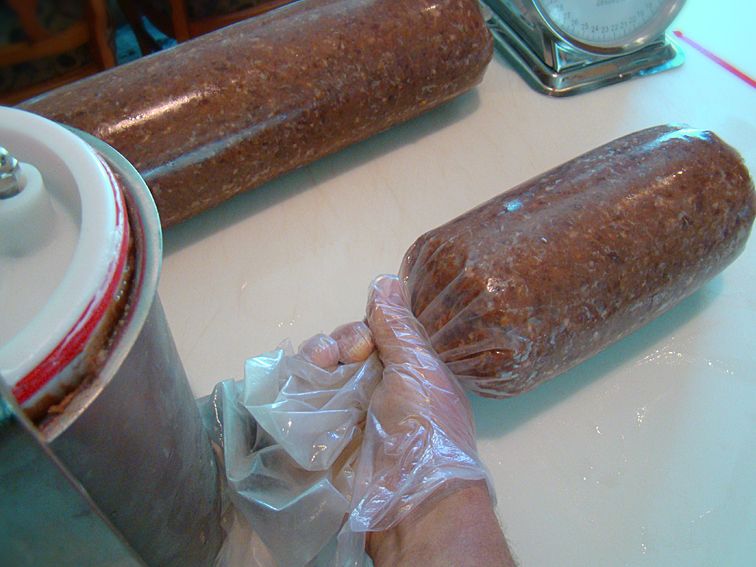
I used 1/2" hog wire to seal the ends of the chubs. I wanted something strong as each of these chubs weighs about 8 pounds.
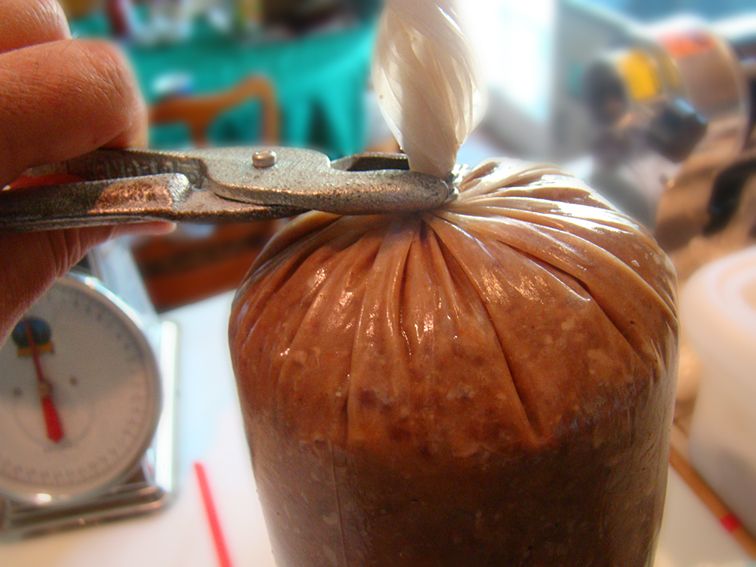 All chubbed up
. Three large monsters and a pee-wee chub.
Now to the smoker...
The recipe calls for a LONG smoke. (12-16 hours minimum, longe =better), but there's no way that's going to happen. My plan is to give the chubs a good dose of heavy smoke for 6-8 hours and finish them in a water bath. After an hour of drying (no smoke) @ 130°), I`ll be using hickory pellets for smoke. Even temps of about 140-145° for a good part of the smoking process. I`ll amp up the temps as we close in on last two hours.
Two-hours in: Starting to pick up a good hickory red.
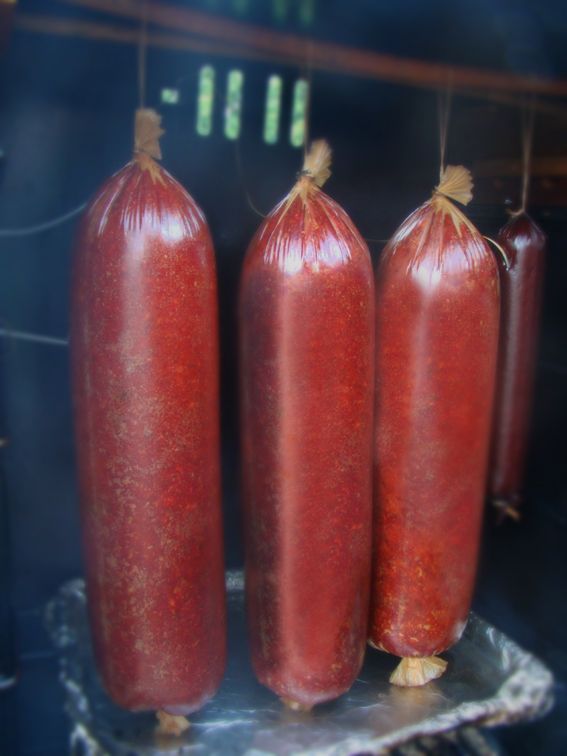
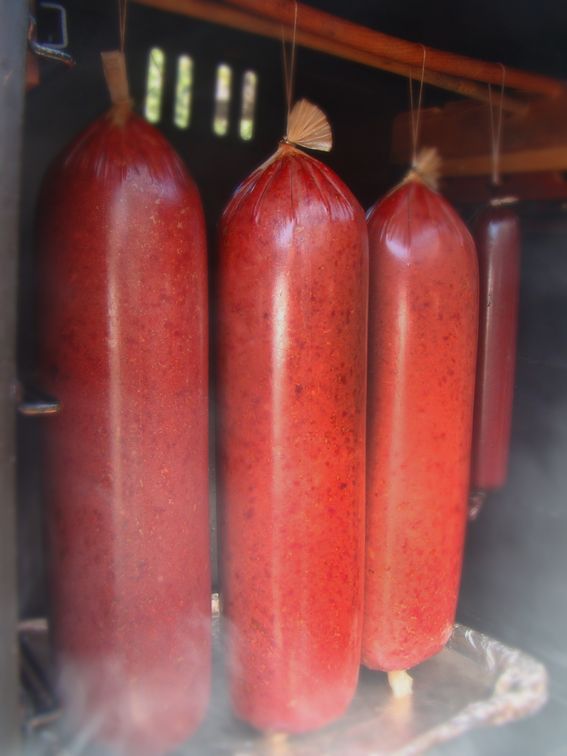 Six-hours in
: Getting a nice even color. Two more hours & we`ll hit the poacher...
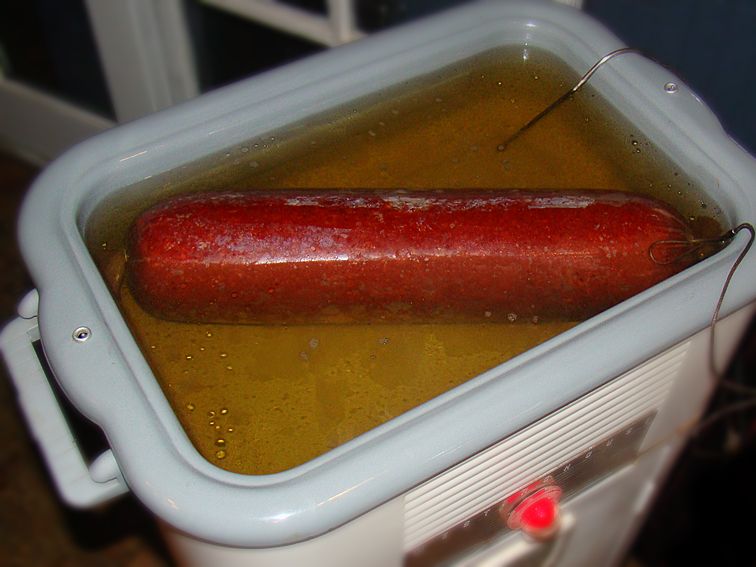
 Regarding the poacher
: My turkey poacher will hold a 22 pound turkey, but I need to make sure the length of large chubs don't exceed the poaching basin. I set a determined length (with the red tape!) when stuffing the chubs. Unfortunately, one turned out a bit longer and so I had to squeeze him in on the diagonal. Total time in the poacher to get it to 154° was abut 2 hours per load. The poaching liquid turned amber from the hickory smoke off the casing.
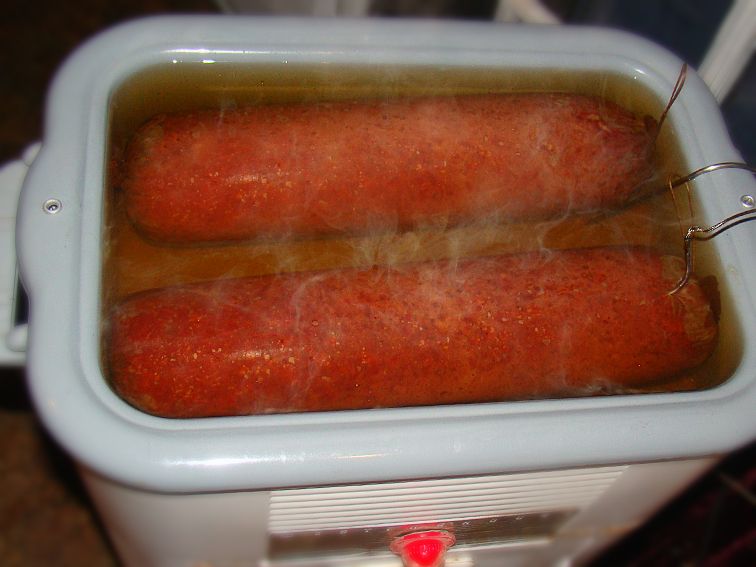
The other two I was able to fit together and they took about the same time as the first chub: about 2 hours to reach the final IT.
The little 'chubbette' I poached in a pot on the stovetop. The little guy only took about 25 minutes to hit the desired IT.
Tub for Two:
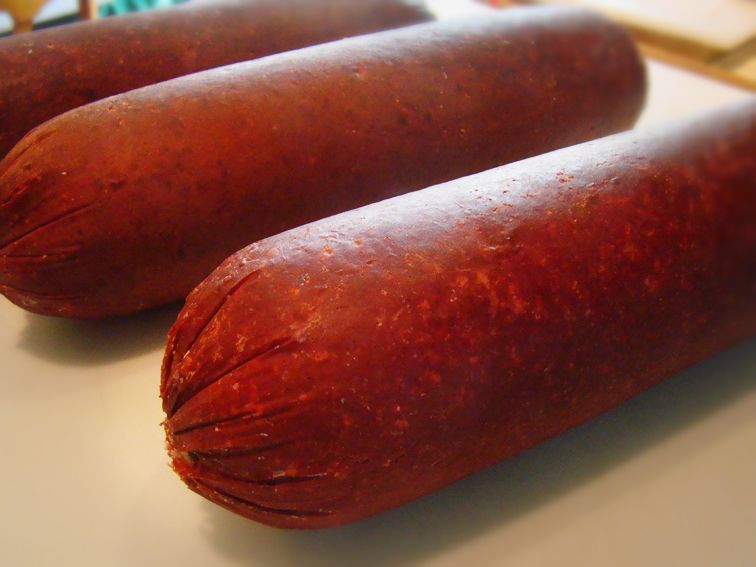
The chubs went to an ice bath to cool and will hang overnight in my fridge to firm up before slicing.
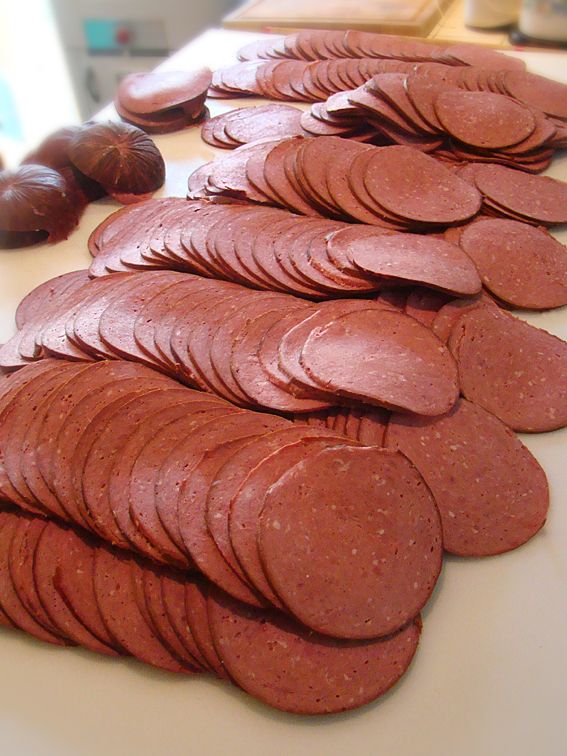
NEXT DAY: After a night of 'chilling' in the fridge, the chubs are now ready to slice.
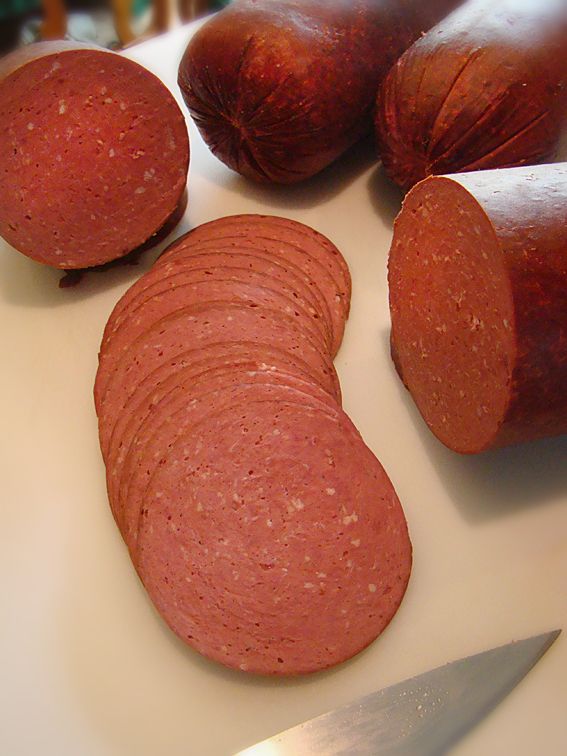
Since I only ground the meat once, I expected a coarser texture than my other 'smooth' bolognas. So I was happy to see that the slices held together nicely. Taste? Very nice smokey taste with a bit of sweetness & tang-pretty much what I remember Lebanon bologna to taste like!
It's not as dark as the store-bought stuff, but the taste is there! The slices have a nice, dense outer ring where the heavy some has penetrated. Very tasty! The fact that its very lean sausage (less than 20% fat) is a plus without losing any flavor.
After slicing up the lot, now comes the vac-seal bags. This should keep us in bologna for awhile!
It goes great on a roll with some horseradish mustard!
...and now to finish that seven-pound batch of braunschweiger I'm working on!
Kevin