Mike's Dry Cure Chamber
Posted: Sun Mar 10, 2013 03:31
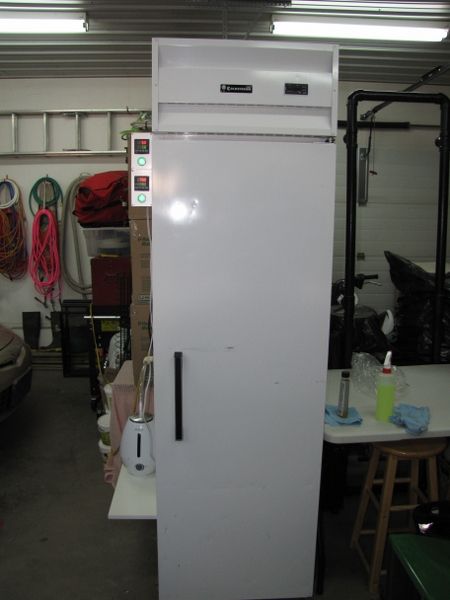
I finally got around to building my dry cure cabinet. I picked up this top mount compressor commercial freezer for free. It had a wiring problem so I played around with it until I figured out the problem. Once I had it running I could figure out how I was going to tie in the controls.
I worked with Suyi at Auber some time ago to come up with a controller that could control both adding humidity and dehumidify simultaneously. He has had them on his web site for some time now. Unfortunately it took me a while to find a cabinet and some time to work on it. For the dehumidification cycle I'm using a 3 inch fan mounted on the exterior of the cabinet at the top. I also have an intake vent at the bottom on the opposite side. Both have filters on them.
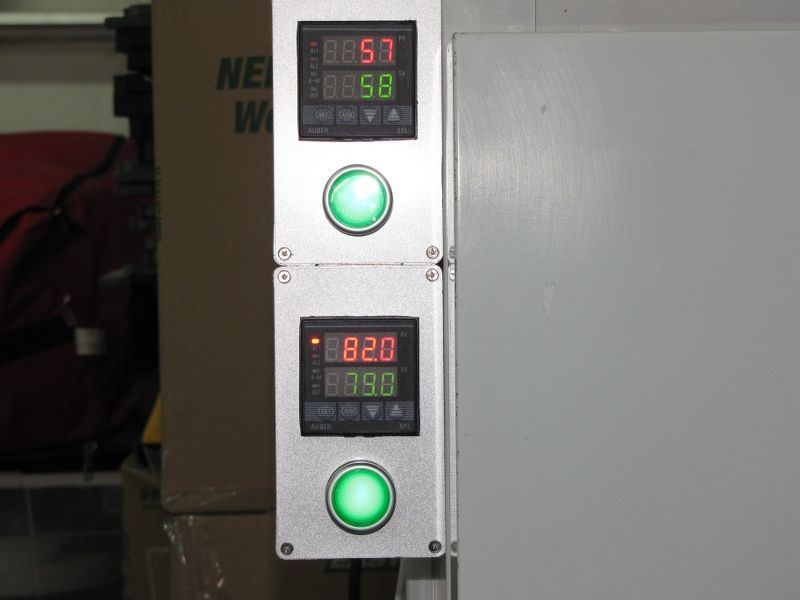
Both the humidity and temperature controllers have dual display so you can see the set value and actual value at the same time which is nice.
So far I've only ran it empty but it's working quit well. I'm getting temperatures of about a 4 degree swing (2 degrees above and 2 degrees below set point). My humidity stays within about a 6% swing (3% over and 3% Under). The only exception is when the compressor cuts in I will loss about 10 or 15% humidity for about 30 or 40 seconds before it recovers. If it over shoots my dehumidify fan cuts in and reduces the humidity.
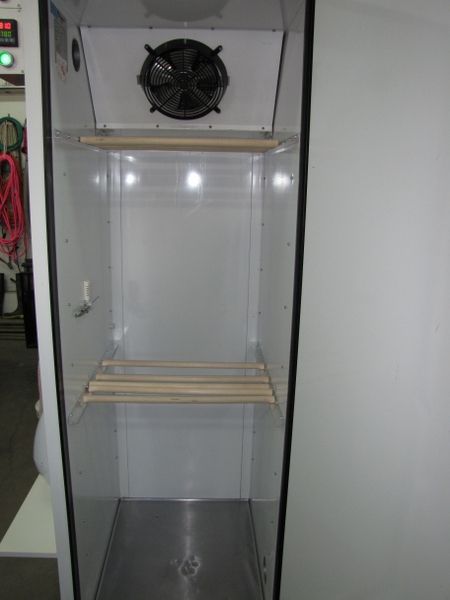
I rewired the fan you see in the cabinet to run while the compressor is running. It was thermostatically controlled but at these temperatures the compressor only runs for about 30 to 40 seconds every 15 to 20 minutes. The fan pulls air in the front and blows it down the back wall. It's a fairly large fan but I was surprised it really doesn't blow that hard which is probably a good thing.
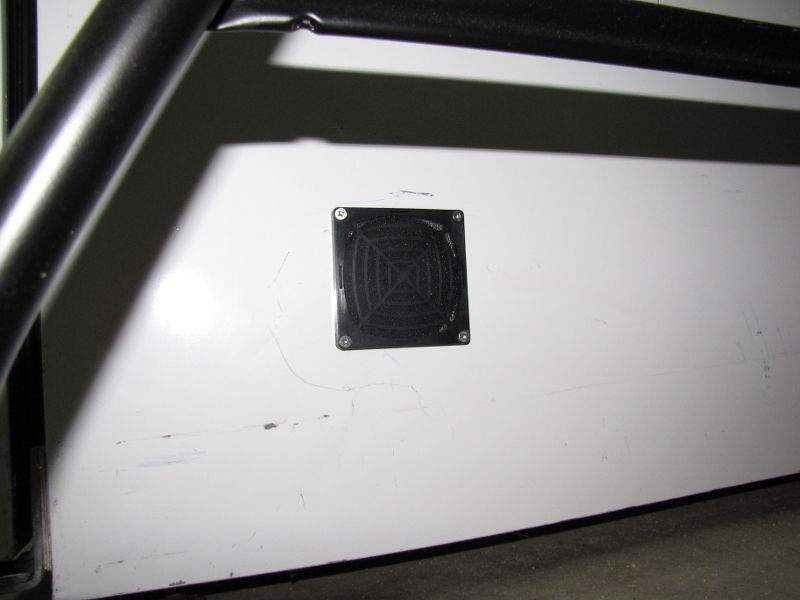
This is the fan used for dehumidifying. There's a filter on the outside of it.
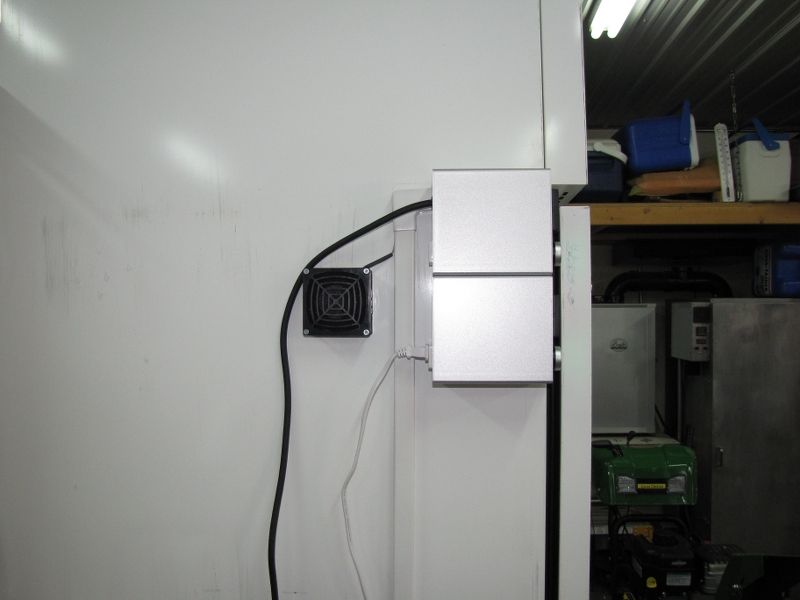
I cut a 3 inch hole for the fan and lined it with aluminum.
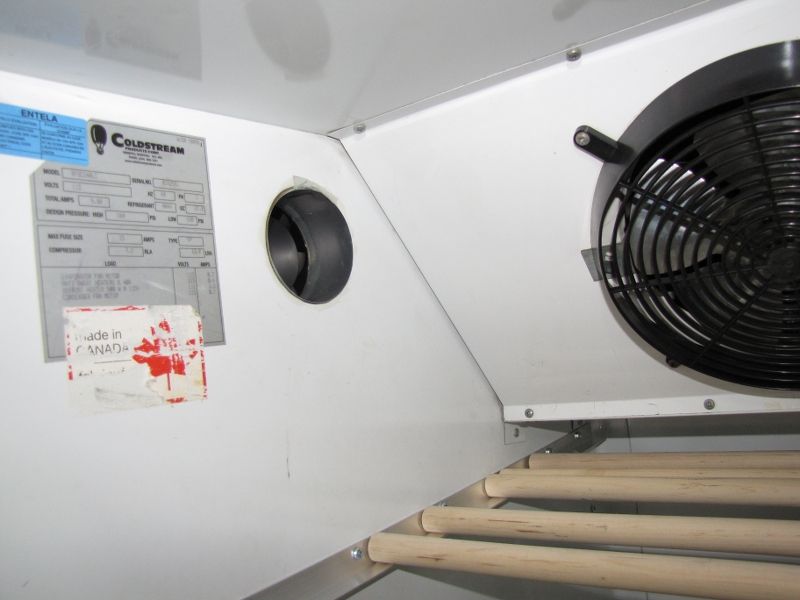
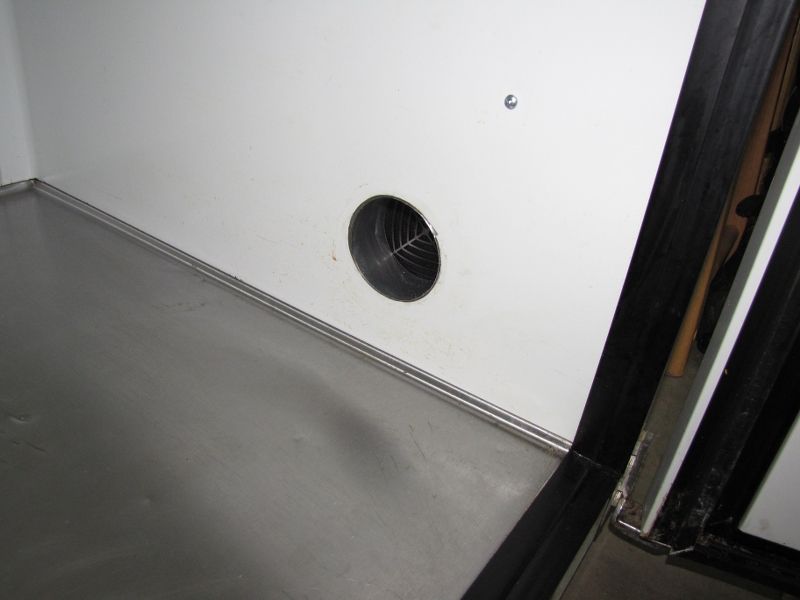
This is the intake for the dehumidify cycle. It's a 3 inch hole as well, lined with aluminum with a filter on the exterior.
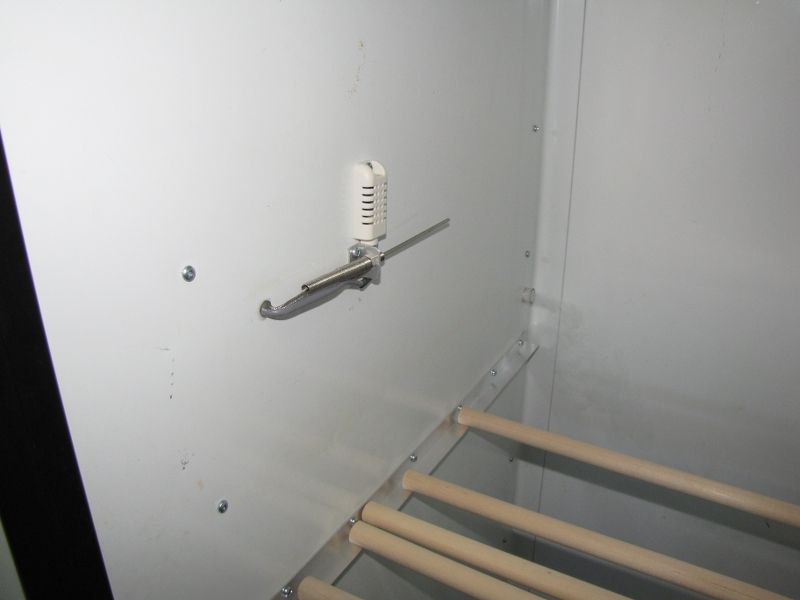
Here's the only thing on the interior of the cabinet, just the thermalcouple and the humidity sensor.
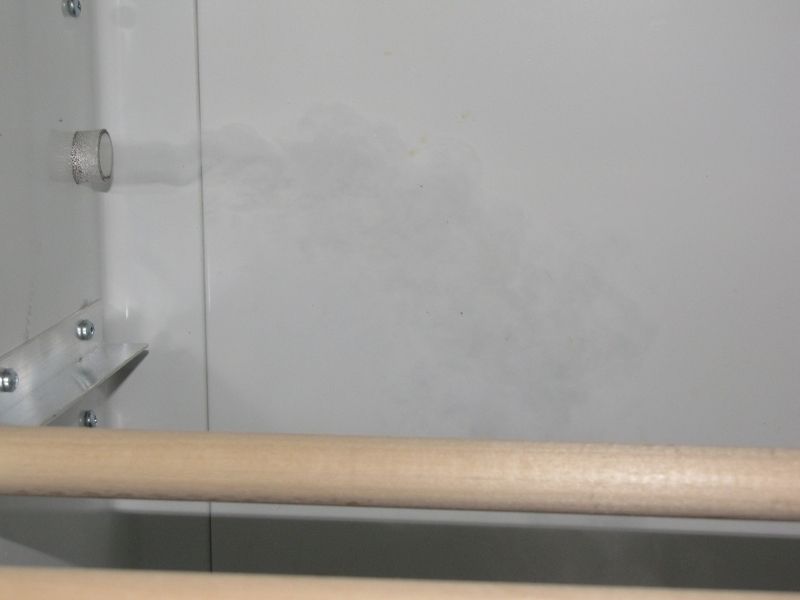
This shows the humidity flowing in through the fitting in the side of the cabinet.
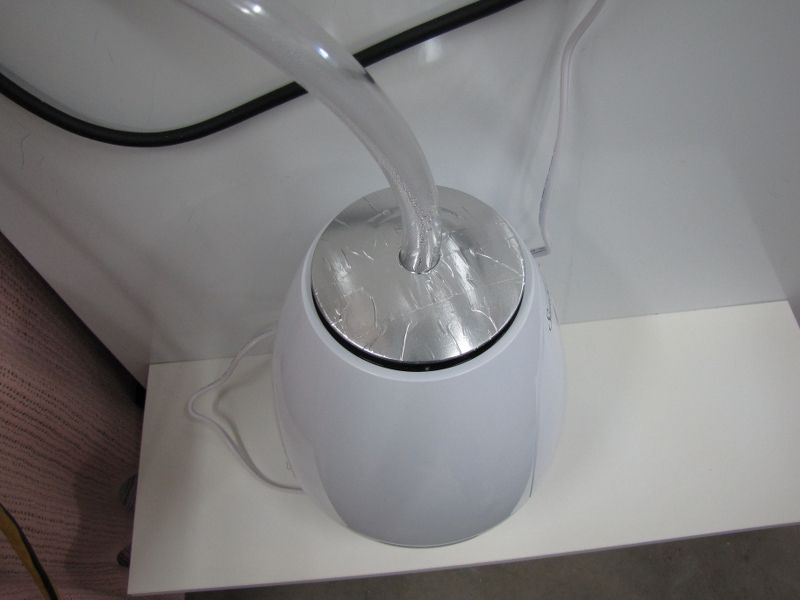
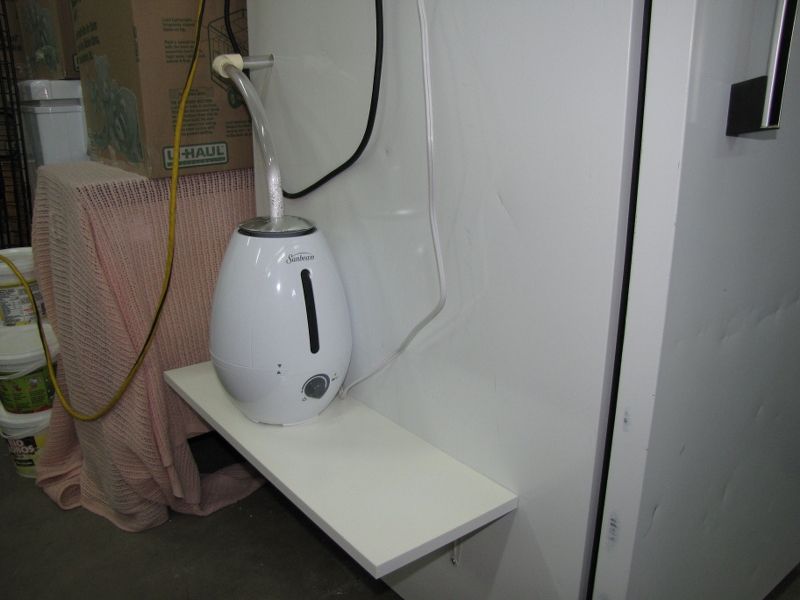
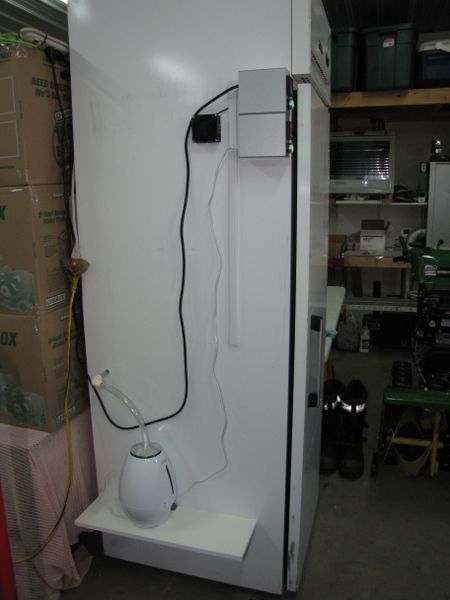
I modified the humidifier to accept a 3/4 inch hose to pipe the humidity into the cabinet.
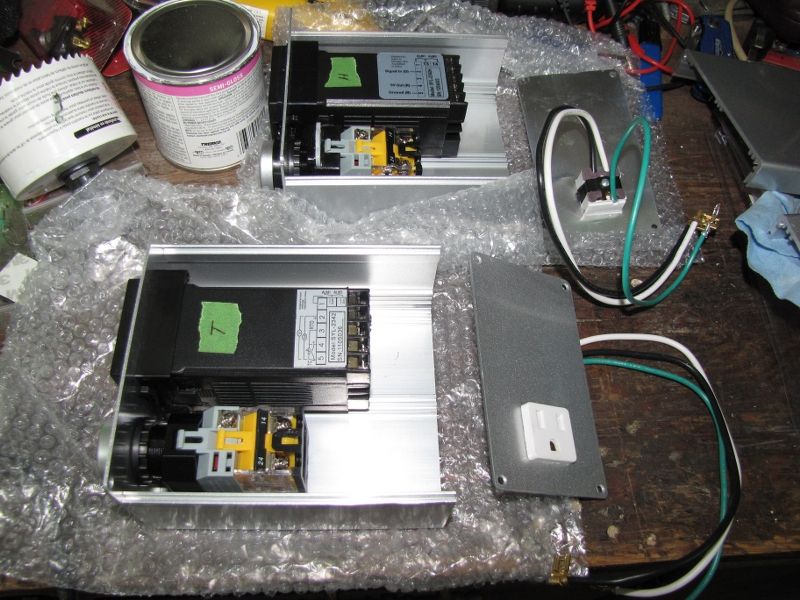
I thought I took more pictures of the wiring but this is the only one I have. With the switch and the plug on the back the boxes are fairly full but work very well.

You can see on the humidity controller the alarm light (small red light) is on bringing the humidity down.
Mike
I worked with Suyi at Auber some time ago to come up with a controller that could control both adding humidity and dehumidify simultaneously. He has had them on his web site for some time now. Unfortunately it took me a while to find a cabinet and some time to work on it. For the dehumidification cycle I'm using a 3 inch fan mounted on the exterior of the cabinet at the top. I also have an intake vent at the bottom on the opposite side. Both have filters on them.
Both the humidity and temperature controllers have dual display so you can see the set value and actual value at the same time which is nice.
So far I've only ran it empty but it's working quit well. I'm getting temperatures of about a 4 degree swing (2 degrees above and 2 degrees below set point). My humidity stays within about a 6% swing (3% over and 3% Under). The only exception is when the compressor cuts in I will loss about 10 or 15% humidity for about 30 or 40 seconds before it recovers. If it over shoots my dehumidify fan cuts in and reduces the humidity.
I rewired the fan you see in the cabinet to run while the compressor is running. It was thermostatically controlled but at these temperatures the compressor only runs for about 30 to 40 seconds every 15 to 20 minutes. The fan pulls air in the front and blows it down the back wall. It's a fairly large fan but I was surprised it really doesn't blow that hard which is probably a good thing.
This is the fan used for dehumidifying. There's a filter on the outside of it.
I cut a 3 inch hole for the fan and lined it with aluminum.
This is the intake for the dehumidify cycle. It's a 3 inch hole as well, lined with aluminum with a filter on the exterior.
Here's the only thing on the interior of the cabinet, just the thermalcouple and the humidity sensor.
This shows the humidity flowing in through the fitting in the side of the cabinet.
I modified the humidifier to accept a 3/4 inch hose to pipe the humidity into the cabinet.
I thought I took more pictures of the wiring but this is the only one I have. With the switch and the plug on the back the boxes are fairly full but work very well.
You can see on the humidity controller the alarm light (small red light) is on bringing the humidity down.
Mike